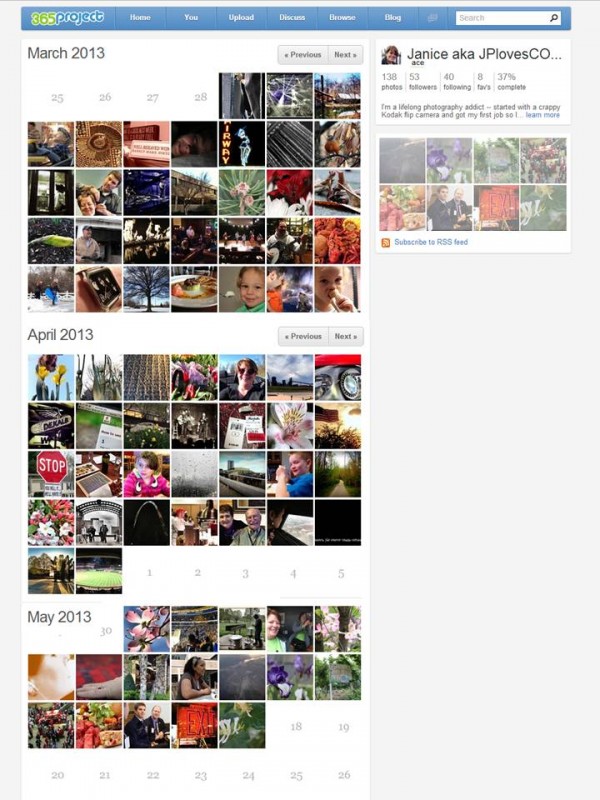
As you know, I have been doing the 365 project. And although I stopped posting the photos here without any fanfare, I have done really well capturing every day this year but one with a photo that is representative of the day (the one day I missed featured a whoops). Here’s a collection of thumbnails from the past couple of months that I thought you may like to see before we go on to the photo editing software. You can browse the photos anytime by clicking on the 365 project link in the side bar or going to my page on the 365 project site.
Choosing When to Edit Photos
So looking at all those photos, there are some that are obviously processed or edited. Others are much less obvious. And some were uploaded the exact way I captured them in the camera. it depends on what I think of the photo and whether it conveys what I want it to. Lots of people make the same choices regularly using Instagram, but it is limited in how much you can choose to change. I love Instagram but after a while I was wanting more from my iPhone’s photos.

This isn’t the first time I’ve talked about wanting more. In fact, one of the early March photos included enough photo editing that I made the before and after my wordless Wednesday one week so I won’t bother to explain that one. It looks much more like a painting once it was done. But I will point out I shared my love of SnapSeed (an application on my iPhone & iPad) back then. (Thanks again to Jon Baines from the incredible photography community on Google+ for introducing me to several neat photo apps.)
I continue to play with SnapSeed, sometimes to make photos look unique and sometimes to simply make the photo look as vibrant as what I was seeing that the camera may have missed. Here are a few photos that will illustrate some of what I can do on my mobile with a free app.
Adjusting Spot Lighting with SnapSeed
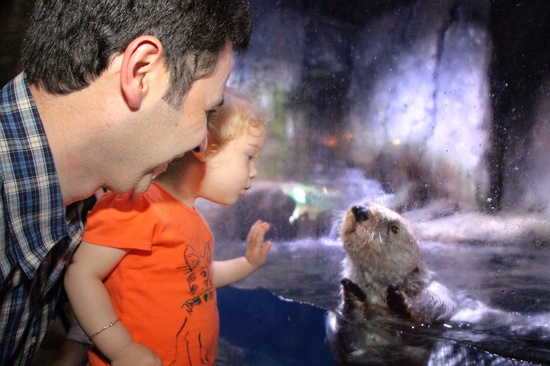
I’d like you to see how you can use Snapseed to make pinpointed lighting changes. So let’s look at the photo I feel I was really lucky to snap of my friend Onur & his daughter meeting an otter at the New Orleans Aquarium.
Here is how my camera saw it. I knew then I had a good photo but I wanted it to be better…. to make it great.

I did a couple of things to the photo.
- I usually look at the “automatic” adjustment SnapSeed recommends. It usually increases the contrast.
- I warmed it up a little bit but adjusting the ambiance and saturation through “tune image” that let me make their skin tones look more like they do without a big huge flash hitting them.
- Finally, I wanted to soften that harsh shadow that seemed to separate the two…. it showed it as less intimate than it was. That was done by using “selective adjust” and dropping a plus into that shadow area and upping the brightness there.
Here’s what I got:
What’s funny about all of this? Although the post is about how to edit mobile photos, I took this photo with my expensive Canon. Most of the photos here though were taken with my iPhone. And lots of folks would have edited it with expensive PhotoShop but I have never felt like I need to use it. I had a version of it previously but found it too complicated to use it very often. I really enjoy taking photos and I wanted something easy to use that would help with the basic photo edits I wanted to make. I love that other people enjoy editing photos for hours (an they can get incredible results!) but to me that feels like work.
Removing Dark Shadows from Faces
I did the same thing in a bigger way this week for a friend who had gotten a photo taken at the ballgame but who was disappointed with how strong the shadows on their faces were. Here’s the before and after photos side-by-side so its easy to see the difference:

So to make this change, what did I do?
- Opened SnapSeed & then opened the photo by using the camera plus icon in the top left corner.
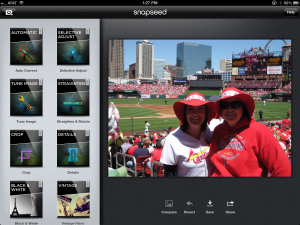
- Chose the “selective adjust” function, and then put put a “control point” on the area you want to change. To do that you, touch the plus mark in the bottom center of the screen and then touch the area you want to lighten.
- You will get a circle with a “B” in the middle for brightness. If you would rather make pinpoint changes in contrast or saturation, simply move your finger up and down on the screen.
- Moving your finger left to right will increase that parameter and right to left will decreases that parameter. You can only adjust 100 percent at a time and it will be shown a lot like time on a clock.
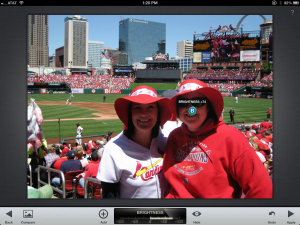
- It you want to make a bigger adjustment, just “apply” the adjustment by clicking on the arrow at bottom right. If you do something crazy, you don’t like, take the arrow at the bottom left to go “back.”
Making Creative Changes to Photos
There are several other features on SnapSeed that let you make more creative changes to the photos. And the best way to learn about them is by playing with them. (I think one of the best things is you add the photo to SnapSeed so you aren’t editing the original which means if you mess up and don’t back out of the changes, your original is still fine. Some of the photo editing software I’ve used I found myself actually saving over the original photos.
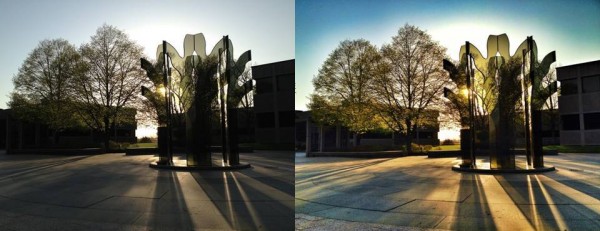
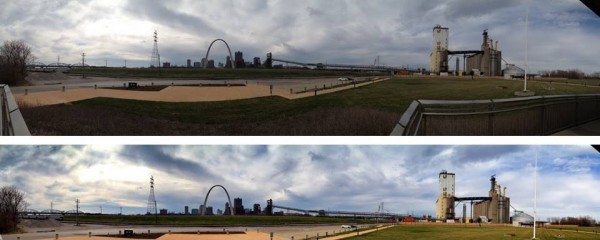
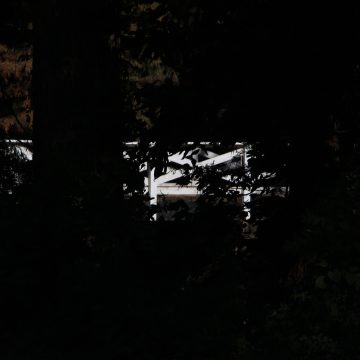
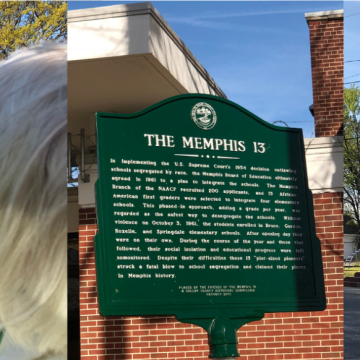
Here are some of the photos I’ve played around with in the past couple of months both before and after editing:
I really wanted to take awesome photos of Noam Pikelny and the others who played “An Evening of Bluegrass” but I rarely take a real camera fearing I’ll be asked to leave it in the car. Since lots of folks were shooting photo and video, I decided to snap a couple of pictures but as you see the lighting sucked for iPhone photography. With a few switches here and there in SnapSeed though I got an awesome photo! Sadly I don’t remember everything I did to the photo since it was so long ago.
This is a sculpture at work that I walk by frequently. The camera didn’t do the lighting justice, but the “drama” filter on Snapseed helped me take it up a few notches. Added a bit of ambiance and pumped up the saturation some too.

This exit sign is really blah til the “grunge” feature and I got busy!
It was a rainy day when I saw prospective students (and their parents) touring St. Louis University. I used a bit of the “vintage” feature and played with the “Drama” to get the effect of how some of those parents looked — others looked really happy though LOL.
When I posted this edited photo of the St. Louis skyline on Facebook, it got a lot of attention. People loved the photo. But nobody was asking about whether it was edited or not. The added light and color really helped it look more real.
What do you think?
Do you edit photos? Leave them as is?
I’ve been thinking about sharing more of the kinds of tips on what apps I think help me be more effective on social media. Do you think these sort of tips are useful? If so, is there something in particular you would like to know about?
—————————————————
A couple of things that came to mind after I hit publish:
- To be clear, I got no money from anyone to say nice things. I said them cause I have shared this software with a couple of folks in the past week and they were really interested so I thought others may be too.
- There are apps for Droid as well as the Apple products so this is inclusive. 🙂


There are so many great apps out there. I really need to play around a biot more with SnapSeed. I seem to always go to some of my other apps first – I really love the Pixlr app for doing on the go edits!
I have played around with several but for some reason SnapSeed seems to be my base and I use the others more selectively. Will check out Pixlr though based on your rec… any specific features you like about it?
What I liked: With all of the features, my images really came out looking like I’d cut them straight from the comic section of the newspaper. Halftone made photos that I couldn’t have made with any other app. I was impressed with the layout, which was well organized and easy to use.
Cool! If you want things to look comic-like, its fun to know how to do that!